> ## Documentation Index
> Fetch the complete documentation index at: https://docs.nexiohost.in/llms.txt
> Use this file to discover all available pages before exploring further.
# Billing & Account
> Manage your NexioHost plans, invoices, and payment methods.
# Billing & Account
All billing and account management is handled through the [NexioHost Client Area](https://billing.nexiohost.in).
Manage your plans, invoices, and payments at billing.nexiohost.in
## Viewing Invoices
1. Log in to the [Client Area](https://billing.nexiohost.in).
2. Go to **Billing → Invoices**.
3. Click any invoice to view or download it as a PDF.
## Payment Methods
We accept the following payment methods:
* Credit & Debit Cards (Visa, Mastercard, American Express)
* PayPal
* UPI
* Cryptocurrency (Bitcoin, Ethereum, USDT)
## Upgrading or Downgrading
1. Go to **Services** in the Client Area.
2. Click on your hosting service.
3. Select **Upgrade/Downgrade**.
4. Choose your new plan and confirm.
Upgrades are applied **immediately** and prorated — you only pay the difference for the remaining billing period.
## Cancellations
### Cancelling a Service
1. Go to **Services** and select the service you want to cancel.
2. Click **Request Cancellation**.
3. Choose **Immediate** or **End of Billing Period**.
4. Submit your cancellation request.
If you're having an issue with your service, reach out in our [Billing Panel](https://billing.nexiohost.in/tickets) or open a ticket before cancelling — we're happy to help.
## Updating Account Details
1. Log in to the [Client Area](https://billing.nexiohost.in).
2. Click your name in the top-right → **Edit Account Details**.
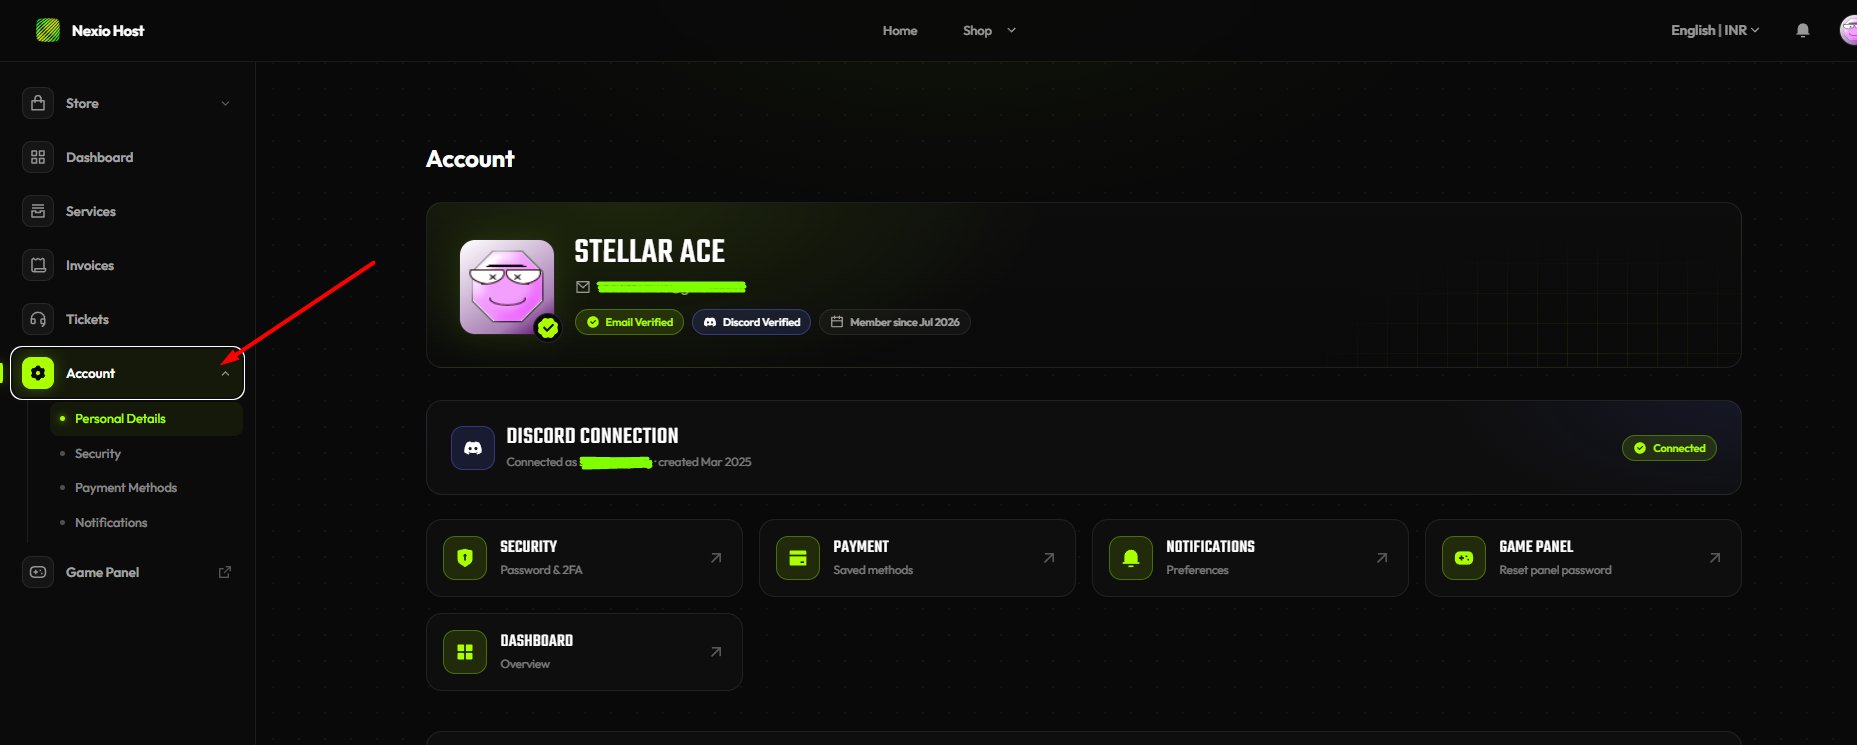 3. Update your name, email, or other details.
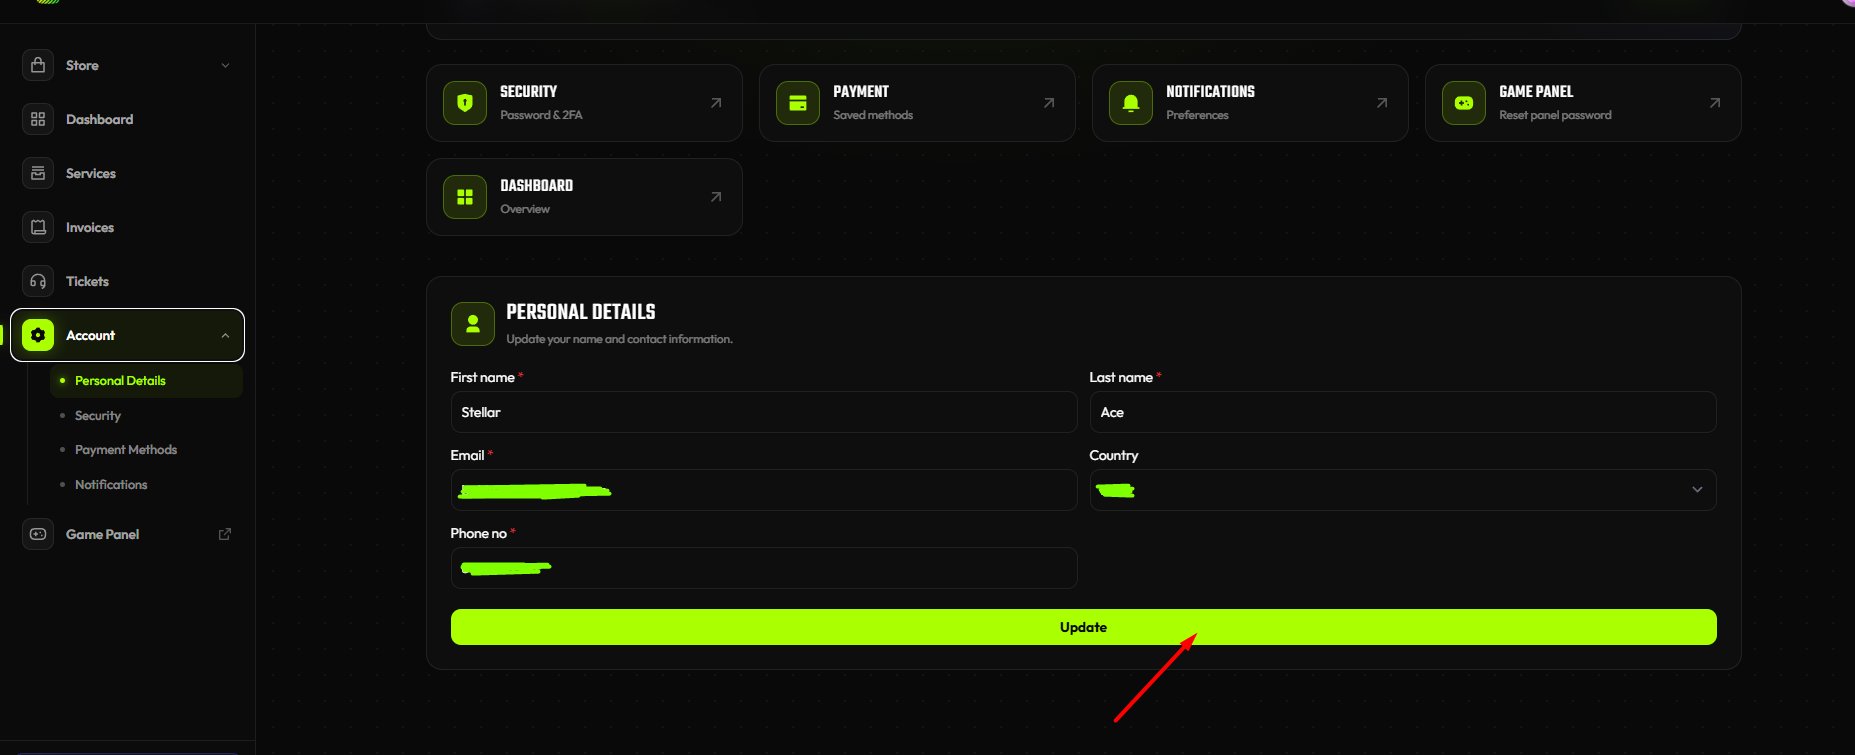 4. Click **Update**.
## Changing Your Password
1. In the Client Area, go to **Account → Security Settings**.
2. Enter your current password and your new password.
4. Click **Update**.
## Changing Your Password
1. In the Client Area, go to **Account → Security Settings**.
2. Enter your current password and your new password.
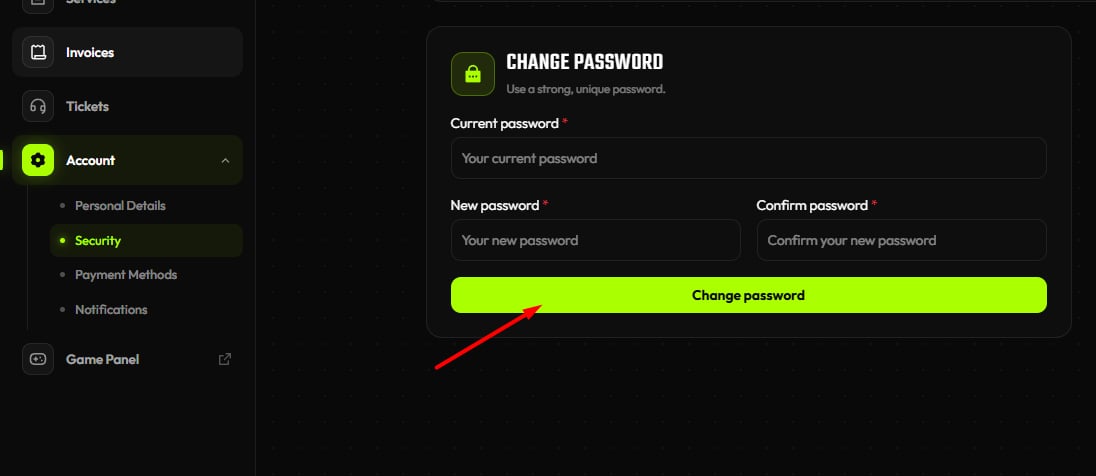 3. Click **Change Password**.
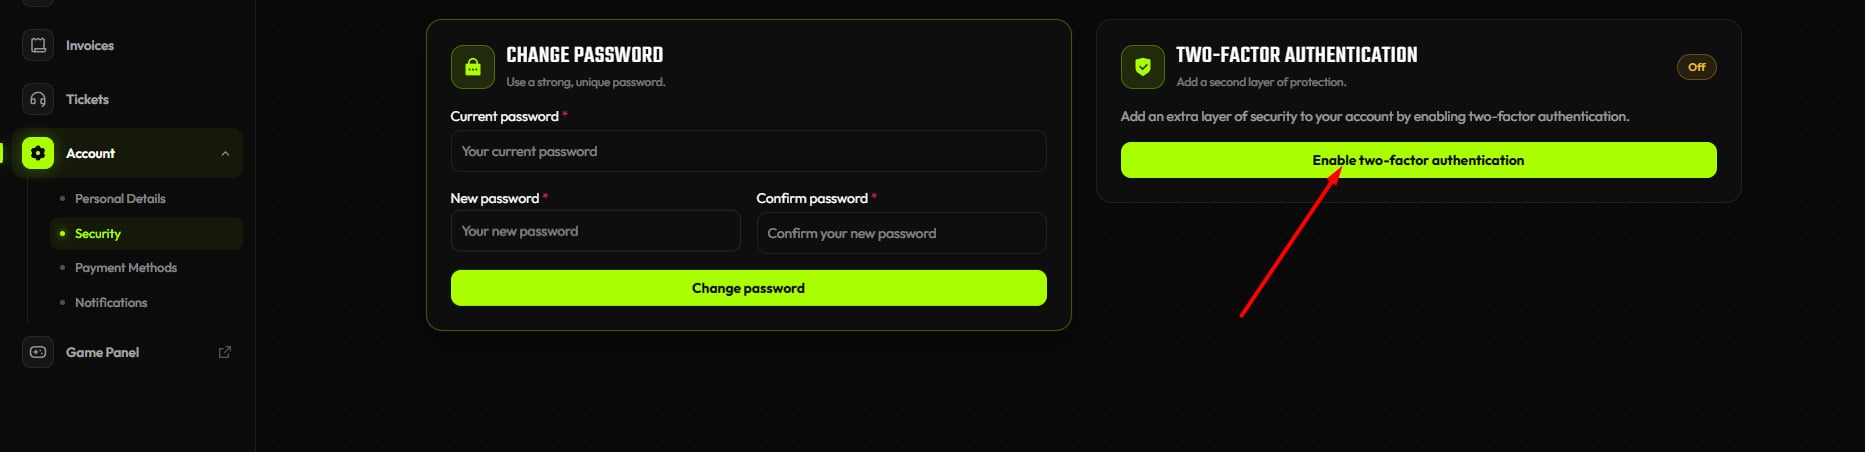
## Two-Factor Authentication (2FA)
Secure your account with 2FA:
1. Go to **Account → Security Settings**.
2. Click **Enable Two-Factor Authentication**.
3. Click **Change Password**.
## Two-Factor Authentication (2FA)
Secure your account with 2FA:
1. Go to **Account → Security Settings**.
2. Click **Enable Two-Factor Authentication**.
 3. Scan the QR code with an authenticator app (Google Authenticator, Authy, etc.).
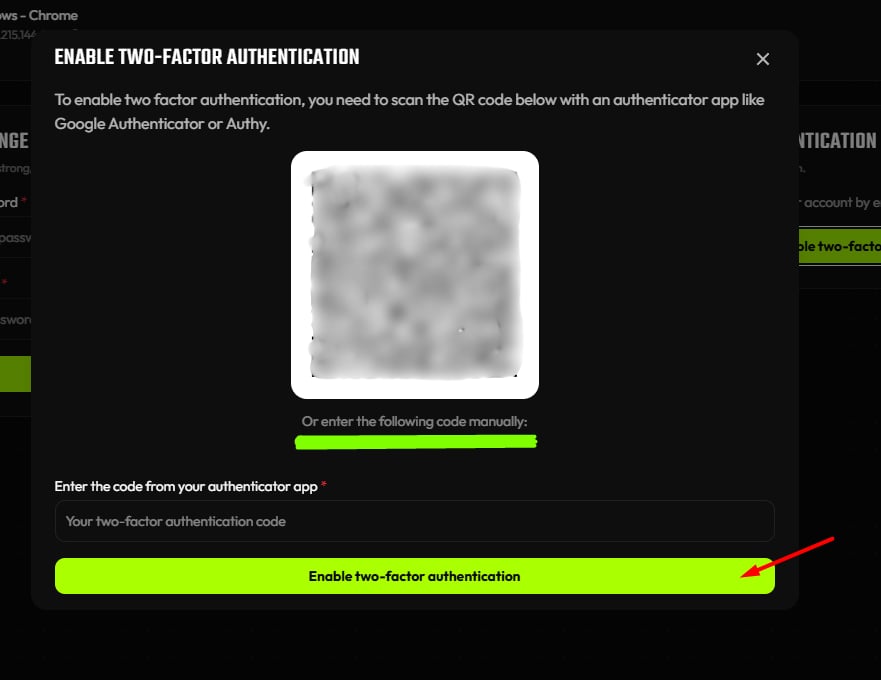 4. Enter the 6-digit code to confirm.
We strongly recommend enabling 2FA to protect your account and services from unauthorized access.
4. Enter the 6-digit code to confirm.
We strongly recommend enabling 2FA to protect your account and services from unauthorized access.